
viflow tracker – Installation and Configuration
Applies to: viflow tracker | Article: 1427088 | Updated on 23.05.2024
Introduction and Important Notes
viflow tracker is an analysis tool that gives you a comprehensive view of the use, acceptance and performance of your WebModel. Only WebModels created with viflow (from version 6) can be analyzed with viflow tracker.
System Requirements
For smooth operation, the system on which the viflow tracker is used must be permanently available. A server is ideally used for this, but viflow tracker can also be installed and used on any other computer.
- Microsoft Windows Server 2008 R2 from Service Pack 1 or higher
- Hard disk space (SSD recommended): Minimum 1 GB, recommended 2 GB or more
- Memory (RAM): Minimum 4 GB, recommended 8 GB or more
- Port 80 is used for the standard installation, this must not be used by other services
Note on the installed components
Executing the viflowtracker.exe file saves all the required components in one folder.
In addition to viflow tracker, this folder also contains the following applications:
- Apache
- MySQL
- Microsoft Visual C++ runtime environment
Installation
Step 1 – Download viflow tracker
Please download the installation file for viflow tracker. You will find the download link in the delivery email.
Save the file viflowtracker.exe in a folder of your choice (not "Programs (X86)" or "program files (X86)") on the server and run it as administrator. The viflow tracker folder is automatically created in the selected target folder.
DeleteStep 2 – Install Components
Open an administrative command prompt and run the following four files in the viflow tracker folder:
-
vcredist_x64.exe
If the Microsoft Visual C++ runtime environment is already installed, confirm the message with Cancel. -
setup_xampp.bat
Enter 1 in the input window and confirm with ENTER .
- apache\apache_installservice.bat
- mysql\mysql_installservice.bat
viflow tracker has been successfully installed and must be configured in the next few steps so that the connection to one or more WebModels can be established.
DeleteConfiguration
Step 3 – Open viflow tracker for the first time
Open a browser and enter http:// in the address bar and the computer name on which viflow tracker was installed, e.g.:
- http://MYPC/ (NetBIOS),
- http://mypc.domain.tld/ (Full Qualified Domain Name or FQDN),
- http://IP address/
Confirm with ENTER, viflow tracker will open.
DeleteStep 4 – Initial registration
In the login window, enter the username viflow and the password tracker and click SIGN IN![]()
Step 5 – Open WebModel Manager
Click the Administration button at the top right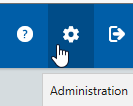 and then under WebModels on the item Manage.
 ![]() In the following view you can see a preconfigured sample WebModel.
In the following view you can see a preconfigured sample WebModel.
Step 6 – Integrate WebModel into viflow tracker
To customize the preconfigured WebModel, click the Edit button.![]() Now assign a name and enter the path to the WebModel to be analyzed under URLs, eg http://yourcompany.de/webmodel/.
Now assign a name and enter the path to the WebModel to be analyzed under URLs, eg http://yourcompany.de/webmodel/. Click the Save button.
Step 7 – Connect your WebModel to viflow tracker
In the viflow tracker folder, open the custom.js file with an editor.
Find the line with the text var TRACKING URL = and enter the URL of viflow tracker behind it:
- http://MYPC/ (NetBIOS),
- http://mypc.domain.tld/ (Full Qualified Domain Name or FQDN),
- http://IP address/
(identical to Step 3 – Open viflow tracker for the first time)
Save the changes and close the editor.
DeleteStep 8 – Connect viflow tracker to your WebModel
Copy the custom.js file to your WebModel's wwwroot\js folder.
DeleteStep 9 (optional) – Connect multiple WebModels to viflow tracker
If you want to connect and analyze several WebModels with viflow tracker, the custom.js file must be adapted for each additional WebModel, provided with an ID and copied to the js folder of the corresponding WebModel.
To do this, open viflow tracker in the browser and carry out the above steps Step 3 – Open viflow tracker for the first time to Step 5 – Open WebModel administration. Now click the Add something to the measurement button and select Website.![]()