viflow logoknowledge base

Contact Us

Menu
en de
  • viflow product page
  • Support request

Contact Us

  • viflow knowledge base
  • viflow – help
  • Quick Start – viflow in 10 steps
  • Step 10: Export as WebModel
Quick Start – viflow in 10 steps

Step 10: Export as WebModel

Applies to: viflow (subscription | 9 | 8) | Article: 1560389 | Updated on 26.04.2024

Delete

››› You can see the introduction or "quick start in 10 steps" here in a video (approx. 15 minutes).

The complete process model with all detailed information can be exported as a WebModel (HTML output).

  • Click on File – Export – Entire Process Model – WebModel
  • Select processes to publish and start page >> click Next
  • Set more UI customization options >> Click Next
  • Select Accent Color and Layout >> Click Next
  • If necessary, enter hyperlinks and feedback address >> click on Next
  • Specify target directory >> click on Finish
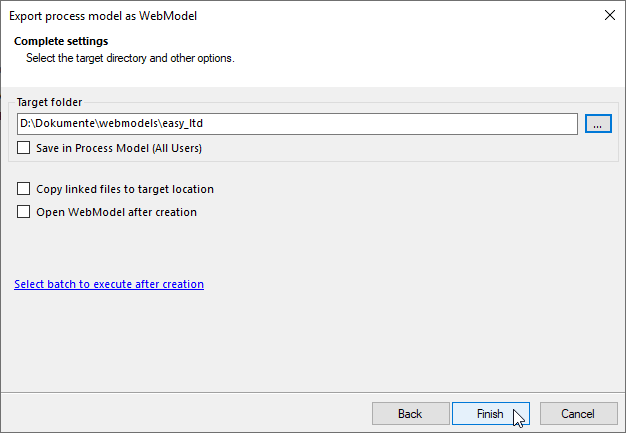
    Settings for export as WebModel
  • WebModel can be displayed in the standard browser, please note the information below.
Delete

Further information on setting up the necessary software infrastructure can be found in our ››› knowledgebase.

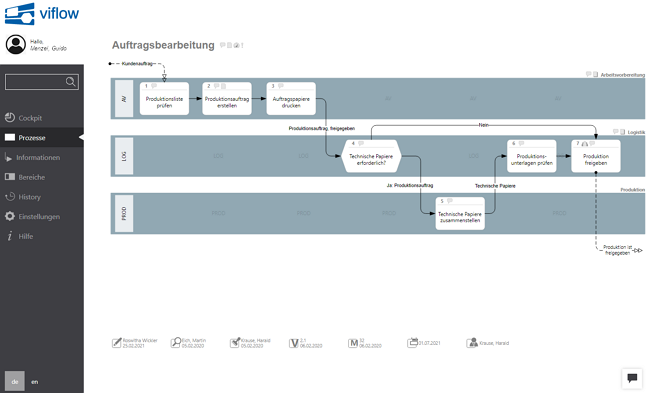
The WebModel in the browser
Delete

The next time you export the same process model, just click the WebModel button to create the WebModel with the previous settings.

Navigation in the web model

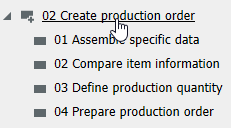
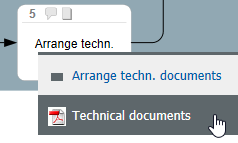
Click on an object in the process graphic or in the navigation window to open its properties. The navigation window is shown/hidden by clicking on the Processes, Information and Areas buttons in the menu bar. This also contains the search function, hyperlinks, email address (for feedback) and settings.

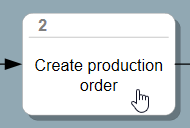
Subprocesses are represented by shading in the graphic and by a plus symbol in the window  marked. Opening the process graphics requires a single click on the shaded process symbol in the navigation window and a double click on the process graphic.

Delete

In the process graphics, the linked documents and the object properties can be opened by clicking (right or left click) on the marked object.

By selecting Folder View or tree view the object is displayed in the corresponding view and the tree is expanded.


All articles in Quick Start – viflow in 10 steps

  • Step 1: Before the first start
  • Step 2: Create a new Process Model
  • Step 3: Create and open processes
  • Step 4: The program interface
  • Step 5: Model areas
  • Step 6: Model processes
  • Step 7: Model information
  • Step 8: Link files and insert hyperlinks
  • Step 9: Create sub-processes
  • Step 10: Export as WebModel
  • Important functions and settings
Quicklinks
  • viflow international
  • viflow functions
  • Trainings
  • viflow life cycle
  • viflow system requirements
  • Remote support
  • viflow updates
SUBMIT SUPPORT REQUEST

Couldn't find a solution? Make a support request.

Submit a support request


FOLLOW US

We inform you regularly about current developments, trends and news around viflow. Just choose the format that's right for you.

Newsletter subscription
vilfow auf facebook ViCon auf Xing ViCon auf Linkedin vilfow auf youtube
Contact Central office

+49 511 696048-0

Sales

+49 511 696048-20

Support support@viflow.de
  • Contact
  • T&Cs
  • Conditions of Use
  • Privacy Statement
  • Legal Info

Copyright © 2003 – 2025 ViCon GmbH | viflow knowledge base | All rights reserved.

info@vicon.biz +49 511 696048-0
Knowledge Base Software powered by Helpjuice

Definition by Author

0
0
  • Kontakt
  • AGB
  • Nutzungsbedingungen
  • Datenschutz
  • Impressum

Copyright © 2003 – 2021 ViCon GmbH | Funktionen | Alle Rechte vorbehalten.

info@vicon.biz +49 511 696048-0
Expand