Overview and other windows
Applies to: viflow 8 | Article: 1636898 | Updated on 23.11.2022
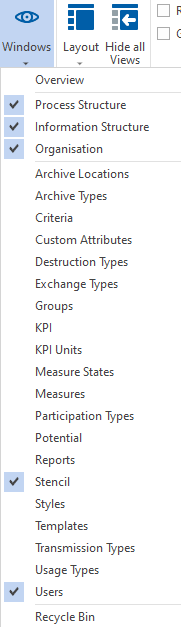
After clicking on the Window button in the View menu, the following windows for entering and maintaining the data of the process model are offered to you. Each element clicked here is opened in a separate window in which further processing can take place.
A tick in front of the individual entries shows which windows are currently open.
If you want to edit several objects in the list, we recommend the overview, which summarizes all data in one window (see below).
Overview – an important tool
In the Overview window, all objects, properties, details, types in your process model - in short: all data relating to the process model - are listed in one window (!). By opening the individual folders and using the context menu [.png) ] you can edit, assign, move and delete the data and objects of the process model - just as you know it from Windows Explorer.
] you can edit, assign, move and delete the data and objects of the process model - just as you know it from Windows Explorer.
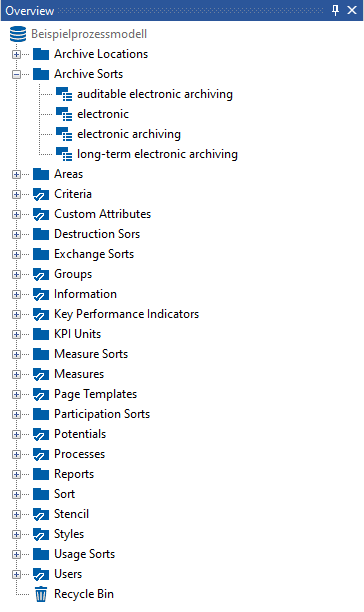
Editing elements in the overview is basically the same. However, there are special features when maintaining and displaying some elements, which you can find in the table below.
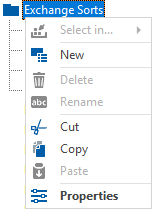
Context menu of list items
The context menu [.png) ] always contains the same elements, which can be active or inactive (grey font), depending on the selected object. In the context menu of the viflow main objects (processes, information, areas) you will also find the option (Graphic) Open and Reports.
] always contains the same elements, which can be active or inactive (grey font), depending on the selected object. In the context menu of the viflow main objects (processes, information, areas) you will also find the option (Graphic) Open and Reports.
The individual functions of the various context menus are described in detail in the chapters ››› "Process structure" window, ››› "Information" window and ››› "Areas" window .
.png) ] the entry Rename.
] the entry Rename.Editing the list elements or objects
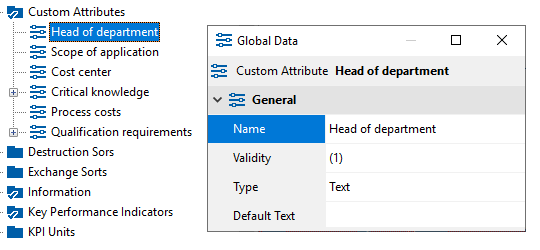
Double click [ .png) ] on an item (object or folder), its properties are displayed in the properties window. Depending on the type of object, you can enter, change or delete various properties such as name, comment or abbreviation here.
] on an item (object or folder), its properties are displayed in the properties window. Depending on the type of object, you can enter, change or delete various properties such as name, comment or abbreviation here.
.png) ] the entry Rename. The new designation can then be entered directly in the list.
] the entry Rename. The new designation can then be entered directly in the list.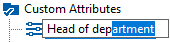
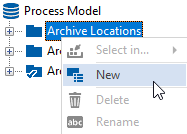
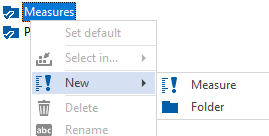
Add an item
Right-click [.png) ] on the object and select the New entry. For some object types you can also create new folders in the list, in which other elements can then be inserted.
] on the object and select the New entry. For some object types you can also create new folders in the list, in which other elements can then be inserted.
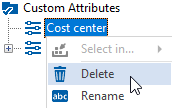
Delete an item
Right-click [.png) ] on the object and select the Delete entry.
] on the object and select the Delete entry.
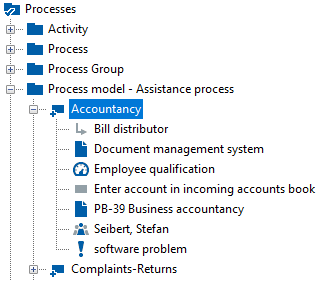
Process Explorer in the Overview
Under Processes you can see the Explorer view, which largely corresponds to the ››› Processes window. However, the following additional information is also displayed here.
 |
|
 ] - Information used in the graphic with local data
 ] - Assigned participants
 ] - Process used in the graphic with local data
 ] - Assigned measure
 ] - Assigned information
 ] - Assigned potential
Using the Recycle Bin
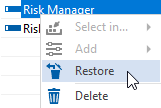
Deleted items are first moved to the recycle bin . If you want to permanently delete the items, right-click Recycle Bin and select Empty Recycle Bin.
If you do not want to delete an element after all, click on Restore in the context menu of the corresponding element.