viflow logoknowledge base

Contact Us

Menu
en de
  • viflow product page
  • Support request

Contact Us

  • viflow knowledge base
  • viflow – help
  • WebModel (HTML Output)
  • Working with the WebModel
  • Customizing the WebModel Cockpit
Working with the WebModel

Customizing the WebModel Cockpit

Applies to: viflow (subscription | 9) | Article: 1867531 | Updated on 30.04.2024

Delete

Please do not delete the WebModel's export folder before exporting again!
The comments and the cockpit settings of the users of the viflow WebModel are saved in the webmodel.sqlite file in the WebModel's export directory and merged with the updated content after another export.
It is therefore best to back up the webmodel.sqlite file so that you do not lose all comments and other personal settings in the cockpit if you accidentally delete the export folder.

In Viflow 8, for the first time, you have the option of creating an individual cockpit that clearly displays the topics that are of interest to you in the form of widgets. Here you can see, for example, whether there are new comments on your processes or whether there are changes in your processes or those you are monitoring.

Prerequisite for using the Cockpit

The integration of an Active Directory is required to display or use the cockpit in the WebModel. You will be "recognized" by the WebModel based on your Windows login information and you can then set up the cockpit individually.

Setup of the Cockpit

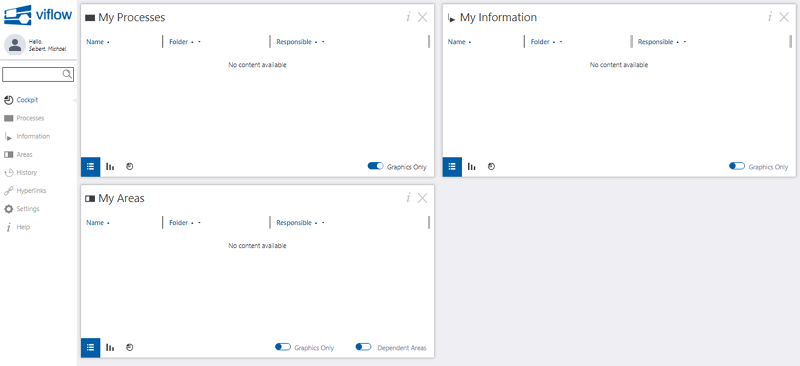
After the first start of the WebModel the Cockpit with the widgets My Processes, My Information and My Areas will be opened automatically.

Delete

Note: The content set here is saved and loaded the next time the WebModel is called up. In order for this functionality to be available, cookies must be activated in your browser settings.

Adding Widgets

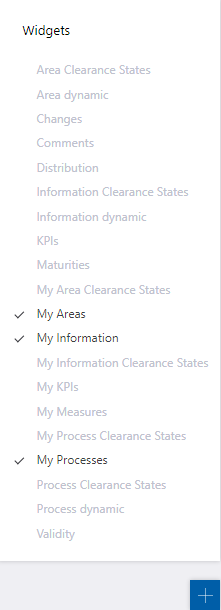
After opening the WebModel or clicking Cockpit, you can add or remove widgets. To do this, click the [+] symbol at the bottom right of the browser window.

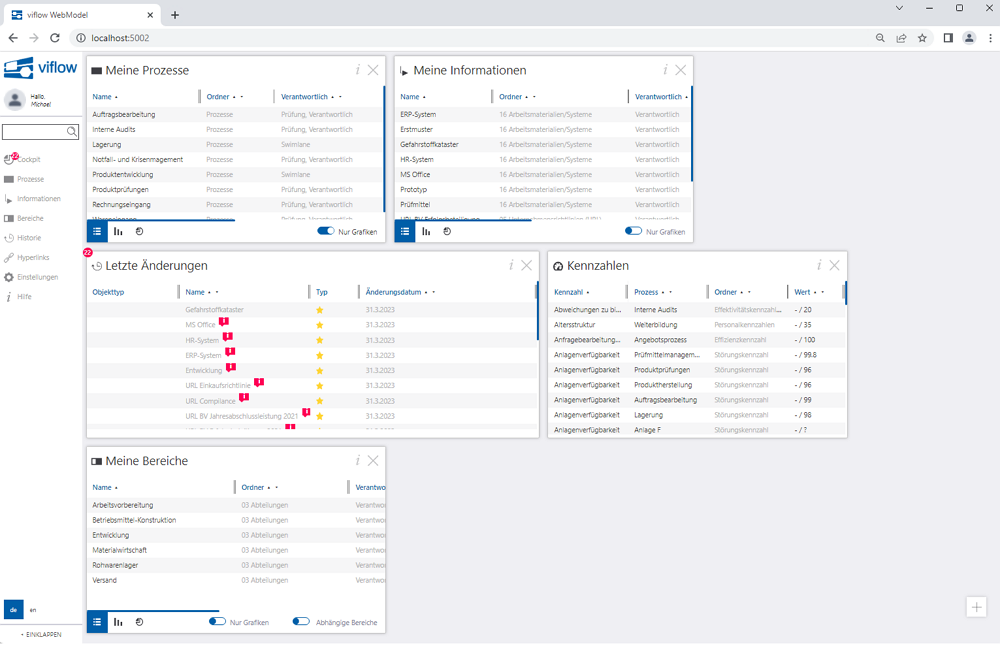
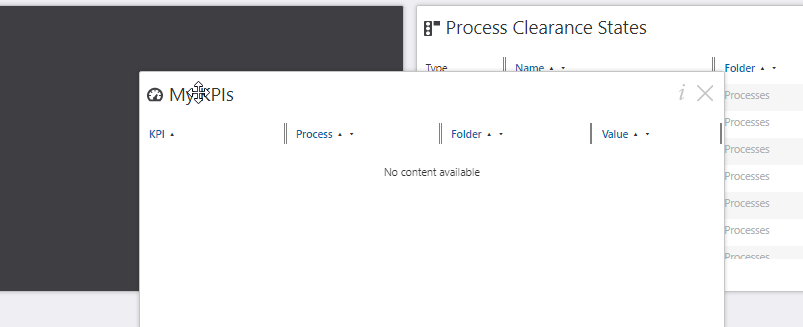
The widgets are arranged on the page in the order of selection, but can be moved to the desired location by clicking and dragging (drag + drop).

With a click on the plus symbol  The widget selection opens at the bottom right and new widgets can be added or removed at any time.

Removing Widgets

If you want to remove a widget from your cockpit, click on the close symbol [X] directly in the widget.

Alternatively, open via the plus symbol  the widget selection and deselect the corresponding entry here.

General functions of the Widgets

Resize Widgets

Depending on the content and size of the monitor, the size of the individual widgets can be changed. To do this, move the mouse pointer over the edge of the widget until you see an arrow symbol [<-->].

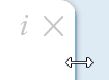
Then drag the window to the desired size while holding down the mouse button.

Delete

Note: The size is not infinite, but can be changed in predefined grid steps.

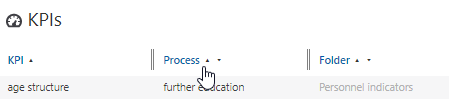
Sorting within the Widgets

If you click on the arrow symbols next to the column headings, you can sort them - alphabetically as in this image; A->Z or Z->A – change.

Searching in the Widgets

If you click on the column heading, the search field appears. Enter the search term or parts of it and confirm with ENTER.

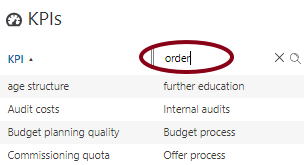
The search results are displayed in the list.

Different views in the Widgets

Some widgets offer the possibility to switch the view between list (default), bar and pie chart.

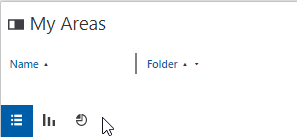
To do this, click on the corresponding buttons at the bottom left of the widget.
If there are additional functions or filter options in the widgets, you will find them at the bottom right of the window.

Overview of the individual Widgets

In the selection you will find general and user-related widgets.

Delete

General widgets apply in principle and independently of the viewer/user in the entire process model.

Delete

User-related widgets start with "My ..." and contain all objects, object types and information in which you are involved as a user. The following participations are taken into account when listing the content:
>>> Processes that you can see in the properties under Participants are assigned (you must be assigned as a user to the selected area).
>>> Processes, Areas , Information Objects that you see in the Management tab under modeling, evaluated, cleared, responsible assigned.
>>> KPIs, your processes, areas, information objects affect.
>>> Approval status of processes, areas, information objects, which you can find in the Management tab under modeling, evaluated, cleared, responsible assigned.
>>> In addition, all entries for objects that you have marked as favorites in the object properties in the WebModel are displayed.
>>> All comments affecting your processes, areas, information objects and affect other objects.

The user-related widgets are marked in red in the table below.

Widget

Description

Specifics/Miscellaneous

Approval status of all areas with folder and responsibility.

  • Clicking on Name opens the properties
  • Filter (Graphics only, active workflow)
  • Three Views

Temporal and quantitative representation of all newly created, edited and deleted areas.

  • Display options for Created, Edited, Deleted, Total

List of all processes with validity, folder and validity date.

  • Clicking on Name opens the properties
  • Traffic light function (green: valid; red: validity exceeded)

Release status of all information with folder and responsibility.

  • Clicking on Name opens the properties
  • Filter (Graphics only, active workflow)
  • Three Views

Temporal and quantitative representation of all newly created, edited and deleted information.

  • Display options for Created, Edited, Deleted, Total

All key figures with process, type, responsibility and value (current/target).

  • Clicking on KPI opens all details about the key figure
  • Clicking on process opens the properties
  • Traffic light function (green: value OK; red: value not OK)

Replies to own comments and new, changed or deleted comments on own objects.


Changes (new, modified, deleted) of own objects and responsibilities since the last visit or last export.

  • Clicking on Name opens the properties

Own areas with process, folder and responsibility.

  • Clicking on Name opens the properties
  • Filters (Dependent Areas)
  • Three Views

Approval status of own areas with folder and responsibility.

  • Clicking on Name opens the properties
  • Filter (Graphics only, active workflow)
  • Three Views

Own information with process, folder and responsibility.

  • Clicking on Name opens the properties
  • Three Views

Approval status of own information with folder and responsibility.

  • Clicking on Name opens the properties
  • Filter (Graphics only, active workflow)
  • Three Views

All key figures with process, type, responsibility and value (current/target).

  • Clicking on KPI opens all details about the key figure
  • Clicking on process opens the properties
  • Traffic light function (green: value OK; red: value not OK)

My measures with potential, process, folder, status and due date.

  • Clicking on Name opens the properties
  • Filter (Completed Actions)

Approval status of own processes with folder, status and responsibility.

  • Clicking on Name opens the properties
  • Filter (Graphics only, active workflow)
  • Three Views

Own processes with process, folder and responsibility.

  • Clicking on Name opens the properties
  • Three Views

Approval status of all processes with folder, status and responsibility.

  • Clicking on Name opens the properties
  • Filter (Graphics only, active workflow)
  • Three Views

Temporal and quantitative representation of all newly created, edited and deleted processes.

  • Display options for Created, Edited, Deleted, Total

Maturity levels of all objects with type, folder and responsibility.

  • Clicking on object name opens the properties
  • Three Views

Information distribution by area with information name, folder and hyperlink.

  • After clicking on area names, information objects, folder and hyperlink are displayed

All articles in Working with the WebModel

  • The WebModel Menu Bar
  • Customizing the WebModel Cockpit
  • The Properties Window in the WebModel
  • Navigation in the WebModel
  • Open linked Documents/Hyperlinks
  • Tips and Tricks
  • Printing from the WebModel
Quicklinks
  • viflow international
  • viflow functions
  • Trainings
  • viflow life cycle
  • viflow system requirements
  • Remote support
  • viflow updates
SUBMIT SUPPORT REQUEST

Couldn't find a solution? Make a support request.

Submit a support request


FOLLOW US

We inform you regularly about current developments, trends and news around viflow. Just choose the format that's right for you.

Newsletter subscription
vilfow auf facebook ViCon auf Xing ViCon auf Linkedin vilfow auf youtube
Contact Central office

+49 511 696048-0

Sales

+49 511 696048-20

Support support@viflow.de
  • Contact
  • T&Cs
  • Conditions of Use
  • Privacy Statement
  • Legal Info

Copyright © 2003 – 2025 ViCon GmbH | viflow knowledge base | All rights reserved.

info@vicon.biz +49 511 696048-0
Knowledge Base Software powered by Helpjuice

Definition by Author

0
0
  • Kontakt
  • AGB
  • Nutzungsbedingungen
  • Datenschutz
  • Impressum

Copyright © 2003 – 2021 ViCon GmbH | Funktionen | Alle Rechte vorbehalten.

info@vicon.biz +49 511 696048-0
Expand